


July 2, 2023
Lithgow Arms LA101 Trigger Spring Installation
- Clear your rifle, ensure the chamber, magazine and bolt face is free of all ammunition Failure to do so may result in Death or serious injury.
- Prepare your work area, clean and tidy an appropriate work surface to avoid loss or damage of small parts.
- Gather required tooling, the required tooling will vary from firearm to firearm and your personal preference however you may require.
- Bits and bit driver, suitable for removing your action screws.
- Pin punch, sized appropriately for removing sear and trigger pins as required.
- Hammer
- Small common screw driver.
- Needle nose pliers.
- Circlip pliers.
- Allen keys.
- Safety Glasses.
- Loctite 222, or nail polish maybe required for some firearms.
Note. During this procedure take care not to lose any small parts, pins bolts screws etc. Place them in a suitable container such as a zip-lock bag or parts bowl.
- Remove the bolt and magazine from your rifle, if fitted and set them aside.
- Remove you barrel and action from the stock, by unfastening the action screws and set your stock aside.
- Remove your trigger mechanism from the barreled action, by unfastening the Allen bolt and set the barreled action aside.
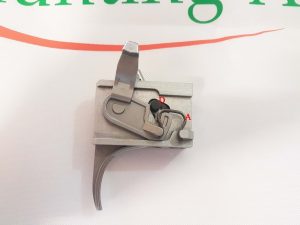
- Remove the safety lever return spring, (item “A”) with needle nose piers take care during this step not to let the spring fly away.
- Remove the circlip, (item “B”).
- Remove safety lever, from trigger body.
- Remove Trigger retaining pin, (item “C”) carefully tap out with pin punch and hammer. You may need to position trigger mechanism on a small block of wood with hole drilled to except the pin or on the edge of a bench. Take care not to lose the pin!
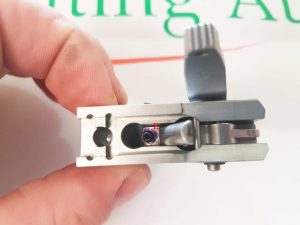
- Loosen grub screw, (item “E”).
- Remove Safety Pin, (item “D”)
- Remove trigger, from trigger body.
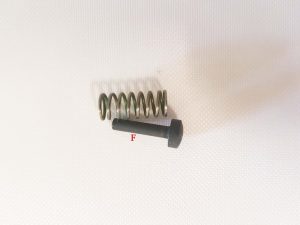
- Remove trigger spring and bolt release plunger, (item “F”) from trigger body.
- Replace trigger spring, with HVHA spring provided.
- Assemble in reverse order, it is a good idea to use thread locker such as 222 Loctite on the grub screw and on the heads of the pins to prevent them from backing out. Though I prefer to use Nail polish instead as it provides ample locking and is easy to remove with acetone in the future if required.
- The last step is a function test, to make sure your rifle is in good working order. Place weapon on safe, pull the trigger. Then place on fire and feel the improvement.


Other Guides


March 5, 2024
Tikka Action Screw Torque
After many questions relating to action screw torque settings I have compiled the following, these values are what I consider [...]
July 2, 2023
Lithgow Arms LA101 Trigger Spring Installation
Clear your rifle, ensure the chamber, magazine and bolt face is free of all ammunition Failure to do so may result [...]

January 2, 2024
CZ 452, CZ 455, BRNO 2, 4, and 5 Trigger Spring
By installing this part, you agree to take full responsibility for any and all legal, health and warranty consequences that [...]